
Configure OpenLDAP Client on Rocky Linux 8 – AlmaLinux 8. Today we will learn how to configure the OpenLDAP Client on Rocky Linux 8 / AlmaLinux 8 and enable authentication and share information about several network resources.
What is OpenLDAP?
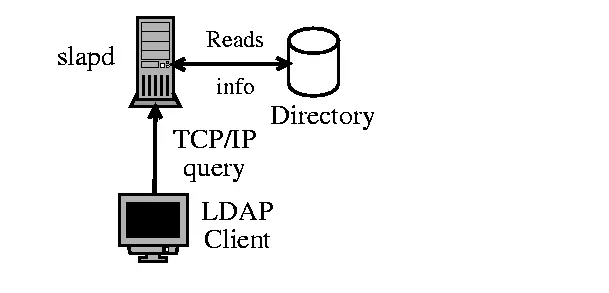
LDAP is an abbreviation of the Lightweight directory access protocol. It is a protocol used to access and modify X.500-based directory service running over TCP/IP. Once configured, LDAP can be used for authentication and sharing information about users, networks, systems, services, and applications from a directory service to other services/applications.
OpenLDAP is a free and open-source implementation of LDAP. This tool provides a command-line utility that can be used to build and manage the LDAP directory. OpenLDAP is highly preferred due to:
- Cost-effective since it is free and open-source
- It offers support for Simple Authentication and Security Layer and Transport Layer Security.
- Enhanced Stand-Alone LDAP Server
- Supports the next generation Internet Protocol version 6.
- Broad applicability due to its flexibility
- It is fully supported on Mac, Windows, and Linux systems.
- Updated C API which is very essential to developers
- Full compliance with the LDAP Data Interchange Format (LDIF) version 1
Once the OpenLDAP server has been set up, you need to configure a client system to authenticate against the directory service. There are several ways to achieve this, but the most preferred way is by using the SSSD service. This is because the SSSD package is provided in most default Linux repositories and makes the administration and provisioning of client systems easier.
The below image shows the OpenLDAP client-server architecture.
Before You Begin
For this guide, I assume that you already have an OpenLDAP server set up. From this page, you can install and configure OpenLDAP using the guides below:
- How To Run OpenLDAP Server in Docker Containers
- Install and Configure OpenLDAP Server on Rocky Linux 8 / AlmaLinux 8
- Install and Configure OpenLDAP Server on CentOS 8|RHEL 8
- Install and Configure OpenLDAP Server on Ubuntu
Once the installation is complete, set the hostname:
sudo hostnamectl set-hostname ldapclient.seoxoom.comNow update your /etc/hosts file as shown:
$ sudo vim /etc/hosts
##OpenLDAP server
192.168.205.2 ldapmaster.seoxoom.com.com

##OpenLDAP Client
192.168.205.16 ldapclient.seoxoom.com
For this, case, my OpenLDAP server is running under the domain name ‘ldapmaster.seoxoom.com’
Verify if the server is reachable:
$ sudo ping -c3 ldapmaster.seoxoom.com
PING ldapmaster.seoxoom.com (192.168.205.2) 56(84) bytes of data.
64 bytes from ldapmaster.seoxoom.com (192.168.205.2): icmp_seq=1 ttl=64 time=0.362 ms
64 bytes from ldapmaster.seoxoom.com (192.168.205.2): icmp_seq=2 ttl=64 time=0.295 ms
64 bytes from ldapmaster.seoxoom.com (192.168.205.2): icmp_seq=3 ttl=64 time=0.265 ms

--- ldapmaster.seoxoom.com ping statistics ---
3 packets transmitted, 3 received, 0% packet loss, time 2030ms
rtt min/avg/max/mdev = 0.265/0.307/0.362/0.043 ms
Step 1 – Install OpenLDAP Client and SSSD Packages
Having configured the FQDN and Hosts file, we will install the OpenLDAP Client and SSSD Packages on Rocky Linux 8 / AlmaLinux 8. The SSSD package(System Security Service Daemon) is used to enrol Linux systems to the directory services such as Active Directory IPA Server, and the LDAP domain.
To install all the required packages, issue the command:
sudo dnf install openldap-clients sssd sssd-ldap oddjob-mkhomedir libsss_sudoDependency Tree:
......
Transaction Summary
================================================================================
Install   1 Package
Upgrade  16 Packages

Total download size: 4.6 M
Is this ok [y/N]: y
Once installed, you need to change the authentication profile to SSSD. List the available profiles
$ authselect list
- minimal	 Local users only for minimal installations
- nis    	 Enable NIS for system authentication
- sssd   	 Enable SSSD for system authentication (also for local users only)
- winbind	 Enable winbind for system authentication
Now switch to the SSSD profile;
$ sudo authselect select sssd with-mkhomedir --force
Backup stored at /var/lib/authselect/backups/2022-09-24-18-22-35.bE7tCJ
Profile "sssd" was selected.
The following nsswitch maps are overwritten by the profile:
- passwd
- group
- netgroup
- automount
- services

Make sure that SSSD service is configured and enabled. See SSSD documentation for more information.

- with-mkhomedir is selected, make sure pam_oddjob_mkhomedir module
  is present and oddjobd service is enabled and active
  - systemctl enable --now oddjobd.service
After this, start and enable the oddjobd service:
sudo systemctl enable --now oddjobd.serviceVerify if the service is running:
$ systemctl status oddjobd.service
● oddjobd.service - privileged operations for unprivileged applications
   Loaded: loaded (/usr/lib/systemd/system/oddjobd.service; enabled; vendor preset: disabled)
   Active: active (running) since Sat 2022-09-24 14:23:52 EDT; 6s ago
 Main PID: 1080524 (oddjobd)
    Tasks: 1 (limit: 23198)
   Memory: 876.0K
   CGroup: /system.slice/oddjobd.service
           └─1080524 /usr/sbin/oddjobd -n -p /run/oddjobd.pid -t 300
Step 2 – Configure OpenLDAP Client and SSSD Services
Once installed, you can configure the OpenLDAP Client and SSSD Services. We will begin by configuring the OpenLDAP Client:
sudo vim /etc/openldap/ldap.confIn the file, define your OpenLDAP server and the base search domain name as configured:
URI ldap://ldapmaster.seoxoom.com
BASE dc=seoxoom,dc=com
SUDOERS_BASE ou=sudo,dc=seoxoom,dc=com
The last line is for the SUDO access we will create later in the guide. Save the file and configure the SSSD service:
sudo vim /etc/sssd/sssd.confAdd the files below and replace the ‘ldap_uri‘, ‘ldap_search_base‘ and ‘sudoers_base‘ appropriately:
[domain/default]
id_provider = ldap
autofs_provider = ldap
auth_provider = ldap
chpass_provider = ldap
ldap_uri = ldap://ldapmaster.seoxoom.com
ldap_search_base = dc=seoxoom,dc=com
sudoers_base ou=sudo,dc=seoxoom,dc=com
sudo_provider = ldap
ldap_id_use_start_tls = True
ldap_tls_cacertdir = /etc/openldap/certs
cache_credentials = True
ldap_tls_reqcert = allow

[sssd]
services = nss, pam, autofs, sudo
domains = default

[nss]
homedir_substring = /home

[sudo]
Save the file and set the required permissions:
sudo chmod 0600 /etc/sssd/sssd.confRestart the service:
sudo systemctl restart sssdVerify if the service is running:
$ systemctl status sssd
● sssd.service - System Security Services Daemon
   Loaded: loaded (/usr/lib/systemd/system/sssd.service; enabled; vendor preset: enabled)
   Active: active (running) since Sat 2022-09-24 14:26:27 EDT; 6s ago
 Main PID: 1081322 (sssd)
    Tasks: 6 (limit: 23198)
   Memory: 45.2M
   CGroup: /system.slice/sssd.service
           ├─1081322 /usr/sbin/sssd -i --logger=files
           ├─1081327 /usr/libexec/sssd/sssd_be --domain implicit_files --uid 0 --gid 0 --logger=files
           ├─1081328 /usr/libexec/sssd/sssd_be --domain default --uid 0 --gid 0 --logger=files
           ├─1081329 /usr/libexec/sssd/sssd_nss --uid 0 --gid 0 --logger=files
           ├─1081330 /usr/libexec/sssd/sssd_pam --uid 0 --gid 0 --logger=files
           └─1081331 /usr/libexec/sssd/sssd_autofs --uid 0 --gid 0 --logger=files
Step 3 – Test OpenLDAP Authentication on Rocky Linux 8 / AlmaLinux 8
Once the above configurations have been made, we will test if we can log in using the available user accounts on the OpenLDAP servers.
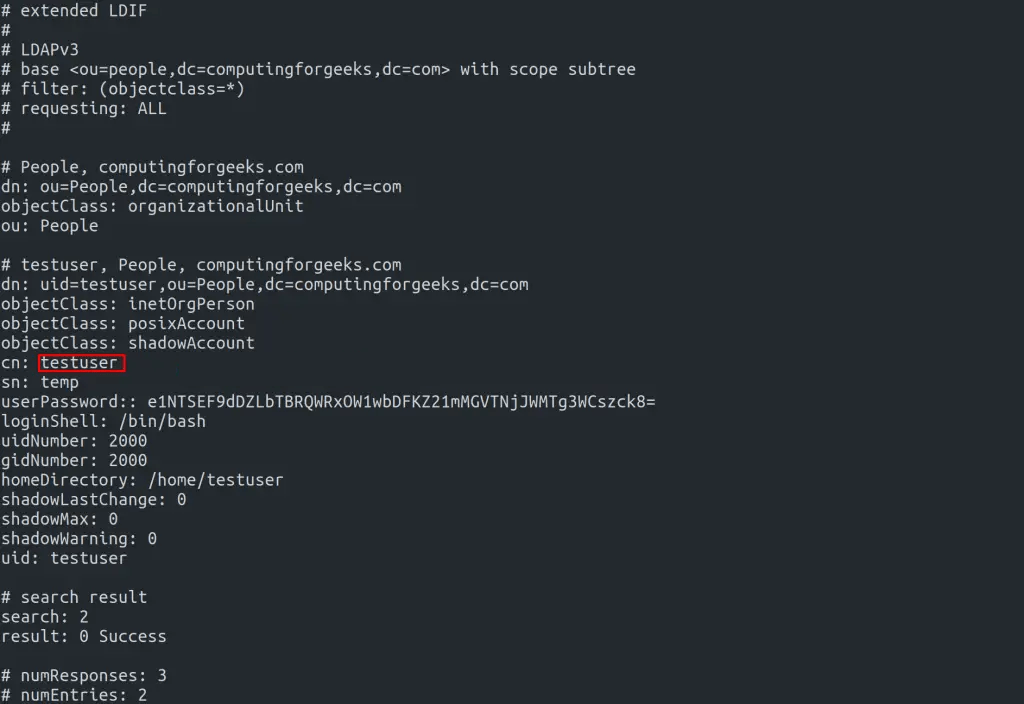
Find the available user accounts on the server:
ldapsearch -x -b "ou=people,dc=seoxoom,dc=com"Sample Output:
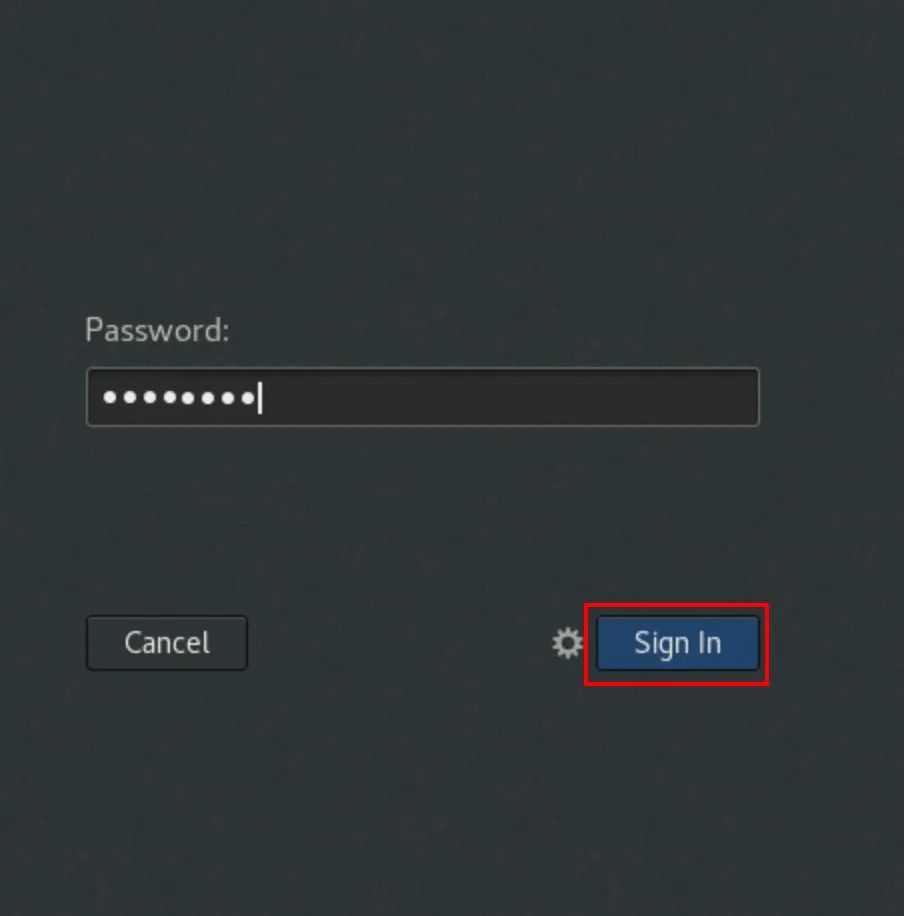
Now we will test by logging in using the user ‘testuser‘. From the GUI, you can log in with the new user account as shown

Provide the password.
Once authenticated, verify the ID as shown.
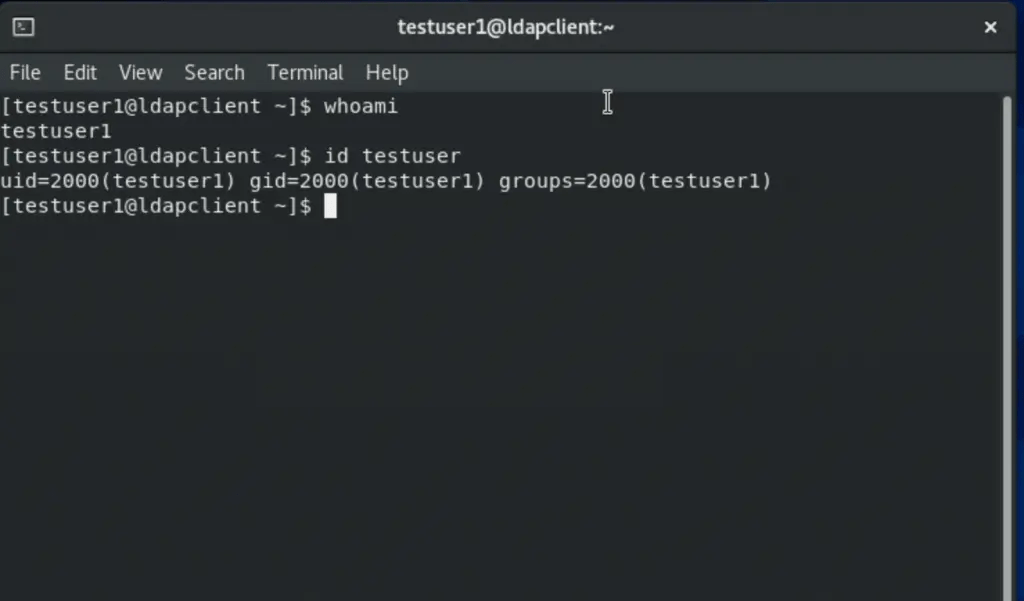
It is also possible to use SSH as shown:
ssh testuser@192.168.205.16Sample output:
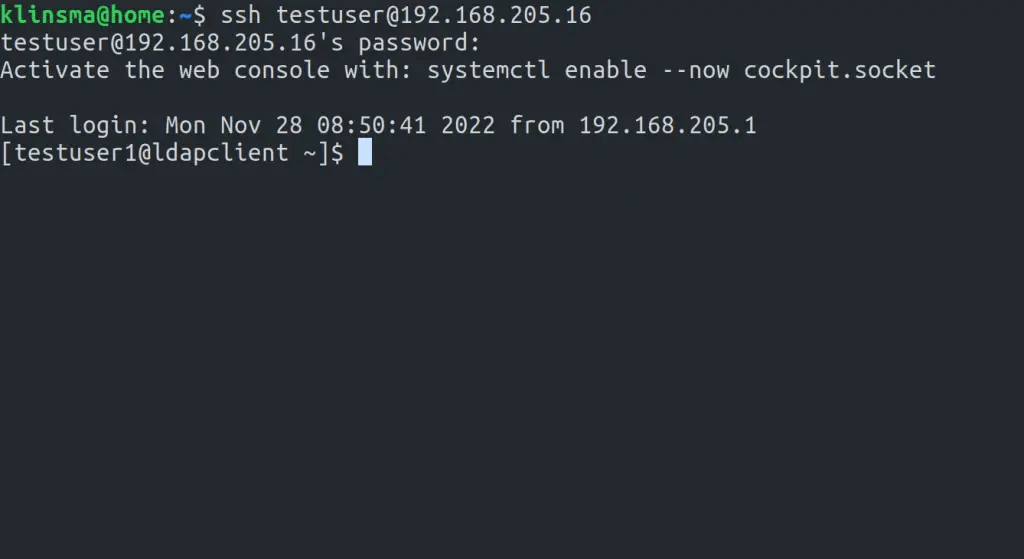
Step 4 – Adding sudoers to OpenLDAP
It is possible to add users with the sudo attribute to OpenLDAP. When setting up the OpenLDAP server, we created an LDIF for the sudo schema at /etc/openldap/schema/sudo.ldif
$ cat /etc/openldap/schema/sudo.ldif
dn: cn=sudo,cn=schema,cn=config
objectClass: olcSchemaConfig
cn: sudo
olcAttributeTypes: {0}( 1.3.6.1.4.1.15953.9.1.1 NAME 'sudoUser' DESC 'User(s) who may  run sudo' EQUALITY caseExactIA5Match SUBSTR caseExactIA5SubstringsMatch SYNTAX 1.3.6.1.4.1.1466.115.121.1.26 )
olcAttributeTypes: {1}( 1.3.6.1.4.1.15953.9.1.2 NAME 'sudoHost' DESC 'Host(s) who may run sudo' EQUALITY caseExactIA5Match SUBSTR caseExactIA5SubstringsMatch SYNTAX 1.3.6.1.4.1.1466.115.121.1.26 )
olcAttributeTypes: {2}( 1.3.6.1.4.1.15953.9.1.3 NAME 'sudoCommand' DESC 'Command(s) to be executed by sudo' EQUALITY caseExactIA5Match SYNTAX 1.3.6.1.4.1.1466.115.121.1.26 )
olcAttributeTypes: {3}( 1.3.6.1.4.1.15953.9.1.4 NAME 'sudoRunAs' DESC 'User(s) impersonated by sudo (deprecated)' EQUALITY caseExactIA5Match SYNTAX 1.3.6.1.4.1.1466.115.121.1.26 )
olcAttributeTypes: {4}( 1.3.6.1.4.1.15953.9.1.5 NAME 'sudoOption' DESC 'Options(s) followed by sudo' EQUALITY caseExactIA5Match SYNTAX 1.3.6.1.4.1.1466.115.121.1.26 )
olcAttributeTypes: {5}( 1.3.6.1.4.1.15953.9.1.6 NAME 'sudoRunAsUser' DESC 'User(s) impersonated by sudo' EQUALITY caseExactIA5Match SYNTAX 1.3.6.1.4.1.1466.115.121.1.26 )
olcAttributeTypes: {6}( 1.3.6.1.4.1.15953.9.1.7 NAME 'sudoRunAsGroup' DESC 'Group(s) impersonated by sudo' EQUALITY caseExactIA5Match SYNTAX 1.3.6.1.4.1.1466.115.121.1.26 )
olcAttributeTypes: {7}( 1.3.6.1.4.1.15953.9.1.8 NAME 'sudoNotBefore' DESC 'Start of time interval for which the entry is valid' EQUALITY generalizedTimeMatch ORDERING generalizedTimeOrderingMatch SYNTAX 1.3.6.1.4.1.1466.115.121.1.24 )
olcAttributeTypes: {8}( 1.3.6.1.4.1.15953.9.1.9 NAME 'sudoNotAfter' DESC 'End of time interval for which the entry is valid' EQUALITY generalizedTimeMatch ORDERING generalizedTimeOrderingMatch SYNTAX 1.3.6.1.4.1.1466.115.121.1.24 )
olcAttributeTypes: {9}( 1.3.6.1.4.1.15953.9.1.10 NAME 'sudoOrder' DESC 'an integer to order the sudoRole entries' EQUALITY integerMatch ORDERING integerOrderingMatch SYNTAX 1.3.6.1.4.1.1466.115.121.1.27 )
olcObjectClasses: {0}( 1.3.6.1.4.1.15953.9.2.1 NAME 'sudoRole' DESC 'Sudoer Entries' SUP top STRUCTURAL MUST cn MAY ( sudoUser $ sudoHost $ sudoCommand $ sudoRunAs $ sudoRunAsUser $ sudoRunAsGroup $ sudoOption $ sudoOrder $ sudoNotBefore $ sudoNotAfter $ description ) )
Now on the OpenLDAP server, create a sudoers Organization Unit (ou)
vim sudoers.ldifIn the file, add the lines below:
dn: ou=sudo,dc=seoxoom,dc=com
objectClass: organizationalUnit
objectClass: top
ou: sudo
description: my-demo LDAP SUDO Entry
Apply the LDIF:
$ sudo ldapadd -x -D cn=Manager,dc=seoxoom,dc=com -W -f sudoers.ldif
Enter LDAP Password:
adding new entry "ou=sudo,dc=seoxoom,dc=com"
Create the defaults LDIF:
$ vim defaults.ldif
dn: cn=defaults,ou=sudo,dc=seoxoom,dc=com
objectClass: sudoRole
objectClass: top
cn: defaults
sudoOption: env_reset
sudoOption: mail_badpass
sudoOption: secure_path=/usr/local/sbin:/usr/local/bin:/usr/sbin:/usr/bin:/sbin:/bin:/snap/bin
#sudoOrder: 1
Apply the changes:
$ sudo ldapadd -x -D cn=Manager,dc=seoxoom,dc=com -W -f defaults.ldif
Enter LDAP Password:
adding new entry "cn=defaults,ou=sudo,dc=seoxoom,dc=com"
Finally, add the user to the role:
$ vim sudo_user.ldif
dn: cn=testuser,ou=sudo,dc=seoxoom,dc=com
objectClass: sudoRole
objectClass: top
cn: testuser
sudoCommand: ALL
sudoHost: ALL
sudoRunAsUser: ALL
sudoUser: testuser
#sudoOrder: 2
Remember to replace testuser with an actual user in your OpenLDAP server. You can also set the exact sudo command to be executed by the user instead of ALL, for example:
sudoCommand: /usr/sbin/useraddIf you want to have the NOPASSWD OpenLDAP SUDO, add the line:
sudooption: !authenticateNow add the LDIF to the server;
sudo ldapadd -x -D cn=Manager,dc=seoxoom,dc=com -W -f sudo_user.ldifOnce added, get back to the LDAP client and modify the file below:
##On the LDAP client##
sudo vim /etc/nsswitch.conf
In the file, add the line:
sudoers: files sssOnce the changes have been made, restart the service:
sudo systemctl restart sssdNow test if sudo has been added for the user:
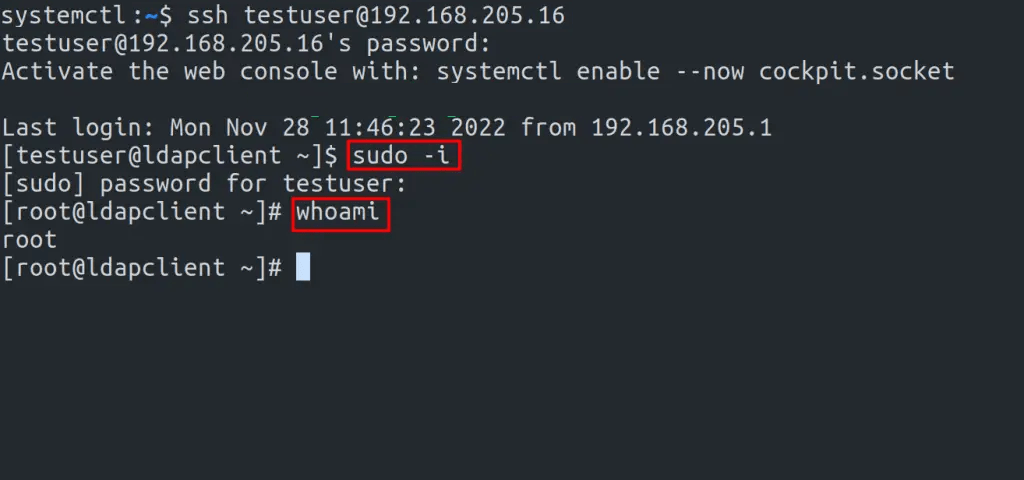
We have successfully configured OpenLDAP Client on Rocky Linux 8 / AlmaLinux 8. Now you can add several Rocky Linux 8 / AlmaLinux 8 clients to the OpenLDAP Server and use them as desired. We have also learned how to configure sudo access for the OpenLDAP users. I hope this was significant to you,