
Setup Free SSL for WordPress on Google Cloud. In this quick-start tutorial you will learn how to configure free, auto-renewing SSL certificates for WordPress websites hosted on Google Cloud Platform compute engine using the Bitnami version of WordPress on Google Cloud Platform.
If you’re using the Click-to-Deploy version of WordPress on Google Cloud Platform, you can view that SSL certificate tutorial here.
Before getting started with this tutorial, you should have already:
- Installed WordPress on Google Cloud
- Set up a Domain Name for your website
Now that you’ve connected to your VM instance, the next step is to copy and paste the certificate issuing command into your terminal. Remember to replace YOURMAIL, YOURDOMAIN, and www.YOURDOMAIN with the correct values.
For example, if your email address is [email protected] and your domains are 1pagezen.com and www.1pagezen.com, then your certificate issuing command would look like this:
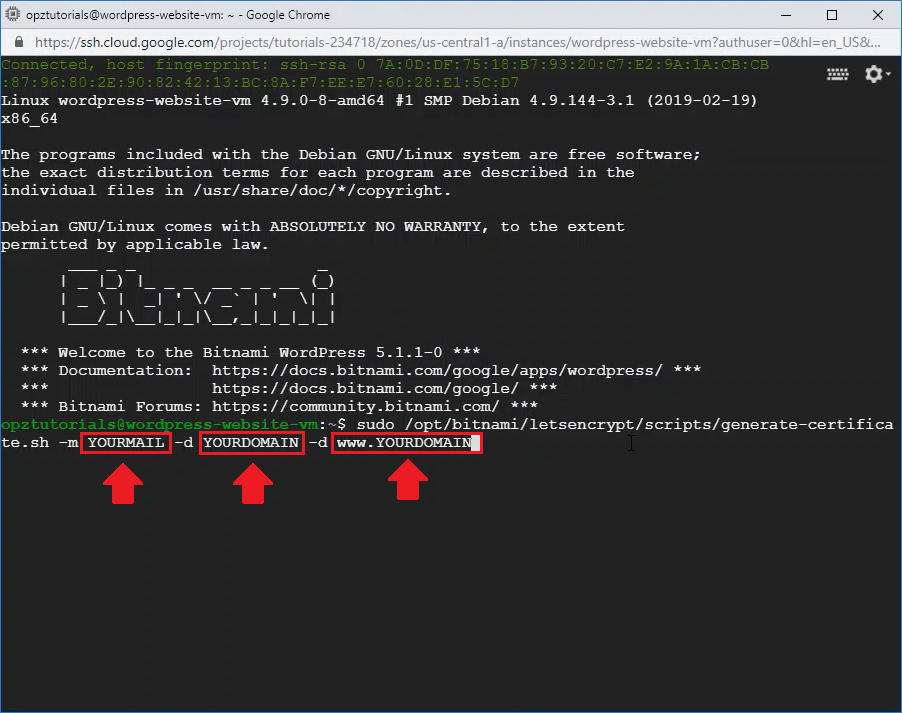
sudo /opt/bitnami/letsencrypt/scripts/generate-certificate.sh -m [email protected] -d seoxoom.com -d www.seoxoom.com3. Configure SSL Certificates
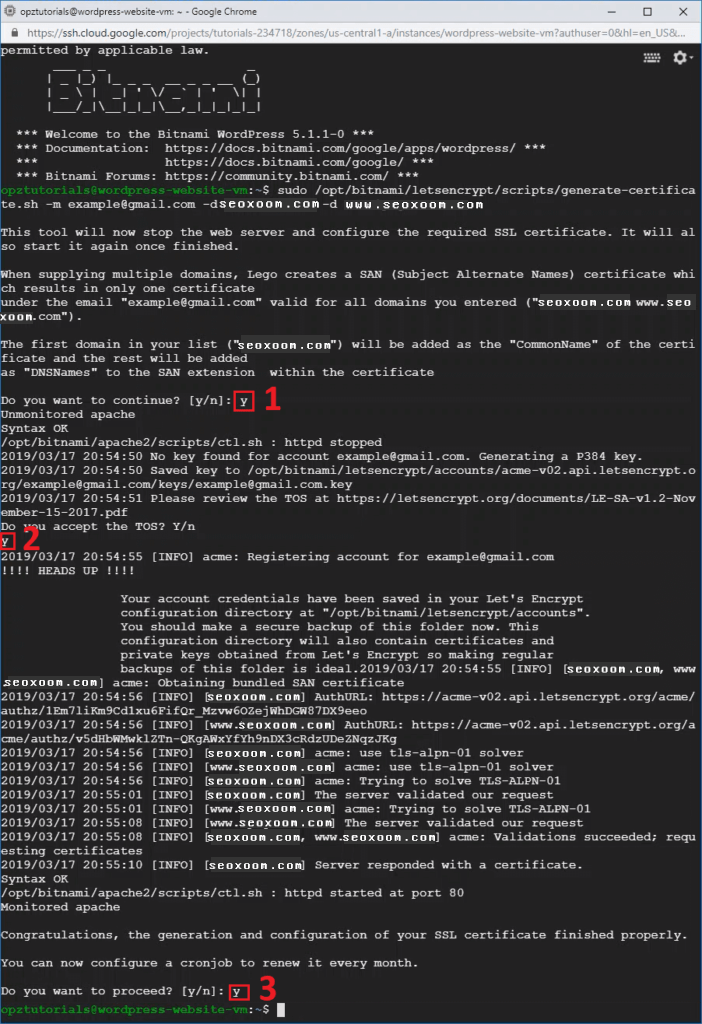
Now that you’ve entered the certificate issuing command, you will be prompted with a series of questions. For each of the three questions, press y and then press Enter.
4. Configure HTTPS Redirect
Now that that the certificates have been configured, the next step is to configure a redirect in your bitnami.conf file in order to redirect all traffic to the HTTPS (secure) version of your website. To do this, copy and paste the command below in order to open the bitnami.conf file for editing.
sudo nano /opt/bitnami/apache2/conf/bitnami/bitnami.confNow that you’ve opened the bitnami.conf file for editing, copy and paste the the three lines of code below, in the same location as shown in the picture (remember to replace seoxoom.com with your own domain name). After editing the file, press CTRL+X then Y to save and exit the file.
RewriteEngine On
RewriteCond %{HTTPS} !=on
RewriteRule ^/(.*) https://www.seoxoom.com/$1 [R,L]
5. Restart Apache Server
In order for the recent file changes to take effect, you must restart your Apache server. To do this, copy and paste the command below into your terminal.
sudo /opt/bitnami/ctlscript.sh restart apacheThat’s it!