
Installing Python 3.11 on Ubuntu is an easy process and can be done quickly using the command line. Ubuntu is the most popular operating system for running Linux-based applications, and it is the perfect platform for using Python.
Python is one of the most popular programming languages today and is used for a variety of tasks such as web development, machine learning, data science, game programming, and more. In this tutorial, we will show you how to install Python 3.11 on Ubuntu 22.04, 20.04, or 18.04.
Before you begin, make sure that you have a working installation of Ubuntu and that you have administrative privileges to perform the steps covered here.
How To Install Python 3.11 on Ubuntu 22.04 |20.04 | 18.04. Programming plays a huge role in the tech world. Without it, you wouldn’t be able to view this article or use your phone, computer, smart TV etc. In this technology-driven world, learning programming can really give you a competitive edge. This can help innovate and create solutions for the global society.
Installing Python 3.11 on Ubuntu is a quick and easy process. Once you have finished the steps above, you will be ready to start developing with the powerful programming language Python.
Programming can be defined as a set of instructions given to a computer to execute. These instructions are written in language that the computer understands. Today there are many programming languages, the most common ones are Java, JavaScript, Ruby, Python, C/C++, Swift e.t.c.
Python is an open-source, high-level object-oriented programming language with a large community. It is one of the most considered languages for beginners. This is mainly because of its simplicity and easy-to-learn syntax. It is used to build a wide range of applications from small and simple scripts to complex machine-learning algorithms. Python is mainly used for:
- Rapid prototyping or production-ready software development.
- Create web applications on servers
- Handling big data and performing complex mathematics.
- Connect to database systems, read and modify files.
- Alongside software to create workflows
The latest release of Python is Python 3.11 made on October 24, 2022. This faster and more user-friendly version has been made available after seventeen months of development. This has resulted in several features and improvements being tagged to it.
The main features associated with Python 3.11 are:
- Faster code execution due to considerable effort in the Faster CPython project
- Better error messages with more informative tracebacks
- Task and exception groups that simplify working with asynchronous code
- Native TOML support for working with configuration files
- Several new typing features that improve Python’s static typing support
- A More powerful Python parser
- Security updates
Install Python 3.11 on Ubuntu 22.04|20.04|18.04
This guide demonstrates how to install Python 3.11 on Ubuntu 22.04|20.04|18.04 Linux machine.
This guide will provide two methods to get Python 3.11 installed on Ubuntu 22.04|20.04|18.04. The two methods are:
- Installing from the deadsnakes PPA
- Manually build Python 3.11 from the source code
But before we proceed, ensure that the system packages are updated to their latest available versions:
sudo apt update && sudo apt upgrade -y
Now choose one of the method that best works for you.
Time needed: 10 minutes
How To Install Python 3.11 on Ubuntu
- Method 1 – Install Python 3.11 on Ubuntu from deadsnakes PPA
The deadsnakes PPA provides the simplest method to install Python 3.11 on Ubuntu 22.04|20.04|18.04. It also enables users to receive continued updates, bug fixes, and security updates. A big thumbs up to this custom PPA!
First, install the required dependency packages:
sudo apt install software-properties-common -y
Add the deadsnakes PPA to the APT package manager sources list.
sudo add-apt-repository ppa:deadsnakes/ppa
Proceed as shown:
……….
To install 3rd-party Python modules, you should use the common Python packaging tools. For an introduction into the Python packaging ecosystem and its tools, refer to the Python Packaging User Guide:
https://packaging.python.org/installing/
Sources
=======
The package sources are available at:
https://github.com/deadsnakes/
Nightly Builds
==============
For nightly builds, see ppa:deadsnakes/nightly https://launchpad.net/~deadsnakes/+archive/ubuntu/nightly
More info: https://launchpad.net/~deadsnakes/+archive/ubuntu/ppa
Press [ENTER] to continue or ctrl-c to cancel adding it
Press Enter to continue. Once the PPA has been added, you can install Python 3.11 on Ubuntu using the commands:
sudo apt install python3.11
Verify the installation:
$ python3.11 u002du002dversion
Python 3.11.1 - Method 2 – Install Python 3.11 on Ubuntu from source
This is an alternative method of installing Python 3.11 on Ubuntu Linux system. With this method, you are guaranteed the latest Python Version. The only problem with this method is that you will not be able to receive continued updates, bug fixes, and security updates through the APT package manager.
Begin by installing the packages required to build Python 3.11 from the source.
sudo apt update u0026u0026 sudo apt install build-essential zlib1g-dev libncurses5-dev libgdbm-dev libnss3-dev libssl-dev libreadline-dev libffi-dev libsqlite3-dev wget libbz2-dev pkg-config -y
Once the packages have been installed, download the latest available Python 3.11 gzipped tarball from the Python official release page.
You can still download the tarball using wget:
wget https://www.python.org/ftp/python/3.11.1/Python-3.11.1.tgz
Extract the downloaded archive:
tar -xf Python-3.11.*.tgz
Now navigate into the directory:
cd Python-3.11.*/
We will check if the required dependencies are met and optimize the binary with the command:
./configure u002du002denable-optimizations
Sample Output:
checking build system type… x86_64-pc-linux-gnu
checking host system type… x86_64-pc-linux-gnu
checking for Python interpreter freezing… ./_bootstrap_python
checking for python3.11… no
checking for python3.10… no
checking for python3.9… no
checking for python3.8… python3.8
checking Python for regen version… Python 3.8.10
checking for pkg-config… /usr/bin/pkg-config
checking pkg-config is at least version 0.9.0… yes
checking for u002du002denable-universalsdk… no
checking for u002du002dwith-universal-archs… no
checking MACHDEP… u0022linuxu0022
checking for gcc… gcc
…..
configure: creating ./config.status
config.status: creating Makefile.pre
config.status: creating Misc/python.pc
config.status: creating Misc/python-embed.pc
config.status: creating Misc/python-config.sh
config.status: creating Modules/Setup.bootstrap
config.status: creating Modules/Setup.stdlib
config.status: creating Modules/ld_so_aix
config.status: creating pyconfig.h
configure: creating Modules/Setup.local
configure: creating Makefile
Once checked, start the build process with the command below. We have used -j to provide the number of cores available on the system, this makes the build process faster:
make -j $(nproc)
Sample Output:
……..
copying and adjusting /home/ubuntu/Python-3.11.1/Tools/scripts/idle3 -u003e build/scripts-3.11 copying and adjusting /home/ubuntu/Python-3.11.1/Tools/scripts/2to3 -u003e build/scripts-3.11 changing mode of build/scripts-3.11/pydoc3 from 664 to 775
changing mode of build/scripts-3.11/idle3 from 664 to 775
changing mode of build/scripts-3.11/2to3 from 664 to 775
renaming build/scripts-3.11/pydoc3 to build/scripts-3.11/pydoc3.11
renaming build/scripts-3.11/idle3 to build/scripts-3.11/idle3.11
renaming build/scripts-3.11/2to3 to build/scripts-3.11/2to3-3.11
gcc -pthread -c -Wsign-compare -DNDEBUG -g -fwrapv -O3 -Wall -fno-semantic-interposition -std=c11 -Objects/moduleobject.o Objects/namespaceobject.o Objects/object.o Objects/obmalloc.o Objects/picklebufobject.o Objects/rangeobject.o Objects/setobject.o Objects/sliceobject.o Objects/structseq.o Objects/tupleobject.o Objects/typeobject.o Objects/unicodeobject.o Objects/unicodectype.o Objects/unionobject.o Objects/weakrefobject.o Python/_warnings.o Python/Python-ast.o Python/Python-tokenize.o Python/asdl.o Python/ast.o Python/ast_opt.o Python/ast_unparse.o Python/bltinmodule.o Python/ceval.o Python/codecs.o Python/compile.o Python/context.o Python/dynamic_annotations.o Python/errors.o Python/frame.o Python/frozenmain.o Python/future.o Python/getargs.o Python/getcompiler.o Python/getcopyright.o Python/getplatform.o Modules/timemodule.o Modules/_weakref.o Modules/_abc.o Modules/_functoolsmodule.o Modules/_localemodule.o Modules/_operator.o Modules/_stat.o Modules/symtablemodule.o Modules/pwdmodule.o Modules/xxsubtype.o Python/deepfreeze/deepfreeze.o Modules/getpath.o Python/frozen.o -lpthread -ldl -lutil -lm make[1]: Leaving directory ‘/home/ubuntu/Python-3.11.1’
Note: Building Python from source can take a long time, depending on your system. You can adjust the number passed to the-joption in themakecommand to specify the number of parallel build jobs to run, which can speed up the build process.
Once the build process is complete, install Python 3.11 with the command:
sudo make altinstall
We have usedaltinstallis used instead ofinstallto keep the default Python binary path in /usr/bin/python.
Execution output:
…….
Looking in links: /tmp/tmprw_g09fu
Processing /tmp/tmprw_g09fu/setuptools-65.5.0-py3-none-any.whl
Processing /tmp/tmprw_g09fu/pip-22.3.1-py3-none-any.whl
Installing collected packages: setuptools, pip
Successfully installed pip-22.3.1 setuptools-65.5.0
WARNING: Running pip as the ‘root’ user can result in broken permissions and conflicting behaviour with the system package manager. It is recommended to use a virtual environment instead: https://pip.pypa.io/warnings/venv
Once complete, check the version:
$ python3.11 u002du002dversion
Python 3.11.1 - Install Python Extensions on Ubuntu 22.04|20.04|18.04
Python modules are important since they add functionality to Python. These modules can be installed using the Python Package manager (PIP).
Install PIP on Ubuntu 22.04|20.04|18.04:
sudo apt install python3-pip
Now use PIP to install any module. The command to use has the syntax:
sudo pip install module-name
For example:
sudo pip install mpesa
Sample output:
Collecting mpesa
Downloading mpesa-0.0.1.tar.gz (2.4 kB)
Preparing metadata (setup.py) … done
Requirement already satisfied: pip in /usr/lib/python3/dist-packages (from mpesa) (22.0.2) Requirement already satisfied: requests in /usr/lib/python3/dist-packages (from mpesa) (2.25.1) Building wheels for collected packages: mpesa
Building wheel for mpesa (setup.py) … done
Created wheel for mpesa: filename=mpesa-0.0.1-py3-none-any.whl size=2626 sha256=9031754a0bdbde5600705450a140ae82845dabb09a9776f44dbcd5b910c1dcd1
Stored in directory: /root/.cache/pip/wheels/bc/4b/55/b4a27060527309dd78bcb6969e653731bb89e00db89f82cfef Successfully built mpesa
Installing collected packages: mpesa
Successfully installed mpesa-0.0.1
WARNING: Running pip as the ‘root’ user can result in broken permissions and conflicting behaviour with the system package manager. It is recommended to use a virtual environment instead: https://pip.pypa.io/warnings/venv
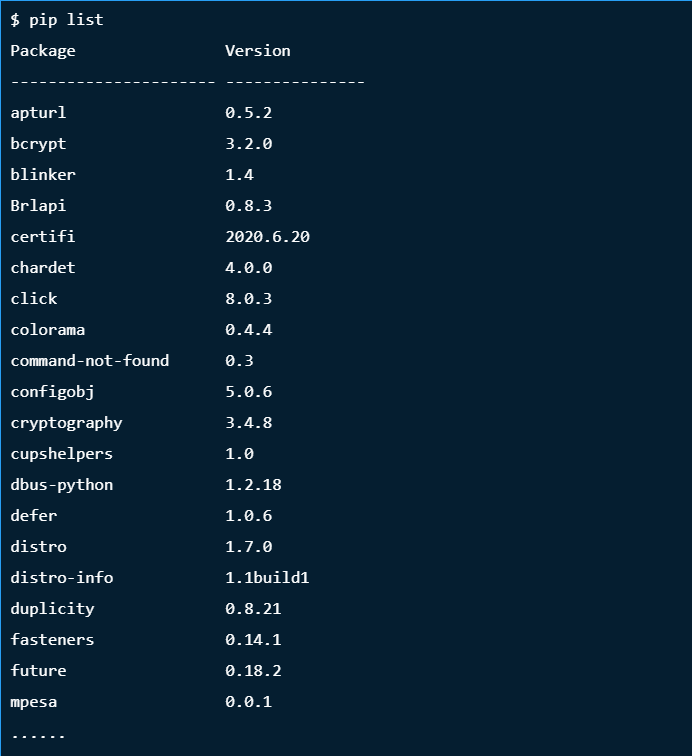
You can list all the installed modules using the command;
Verdict:
We have successfully gone through how to install Python 3.11 on Ubuntu 22.04|20.04|18.04. You can now use the installed Python 3.11 to build web applications, create workflows, software development etc.